This was by far the funnest and most last minute Halloween project I’ve done yet! Mostly fun because it was a Trunk or Treat for my son’s school, his first year at preschool. I’m happy to say we won 3rd place for trunk decor contest… woohoo! 🥉

If you don’t know what a Trunk or treat is, it’s a fun safe Halloween celebration at a church or school where kids can trick or treat down a line of cars, trunk to trunk. They can also enjoy music, bounce houses, face painting, games, costume contests and delicious food. There’s also not a lot of scary decor – super kid friendly!
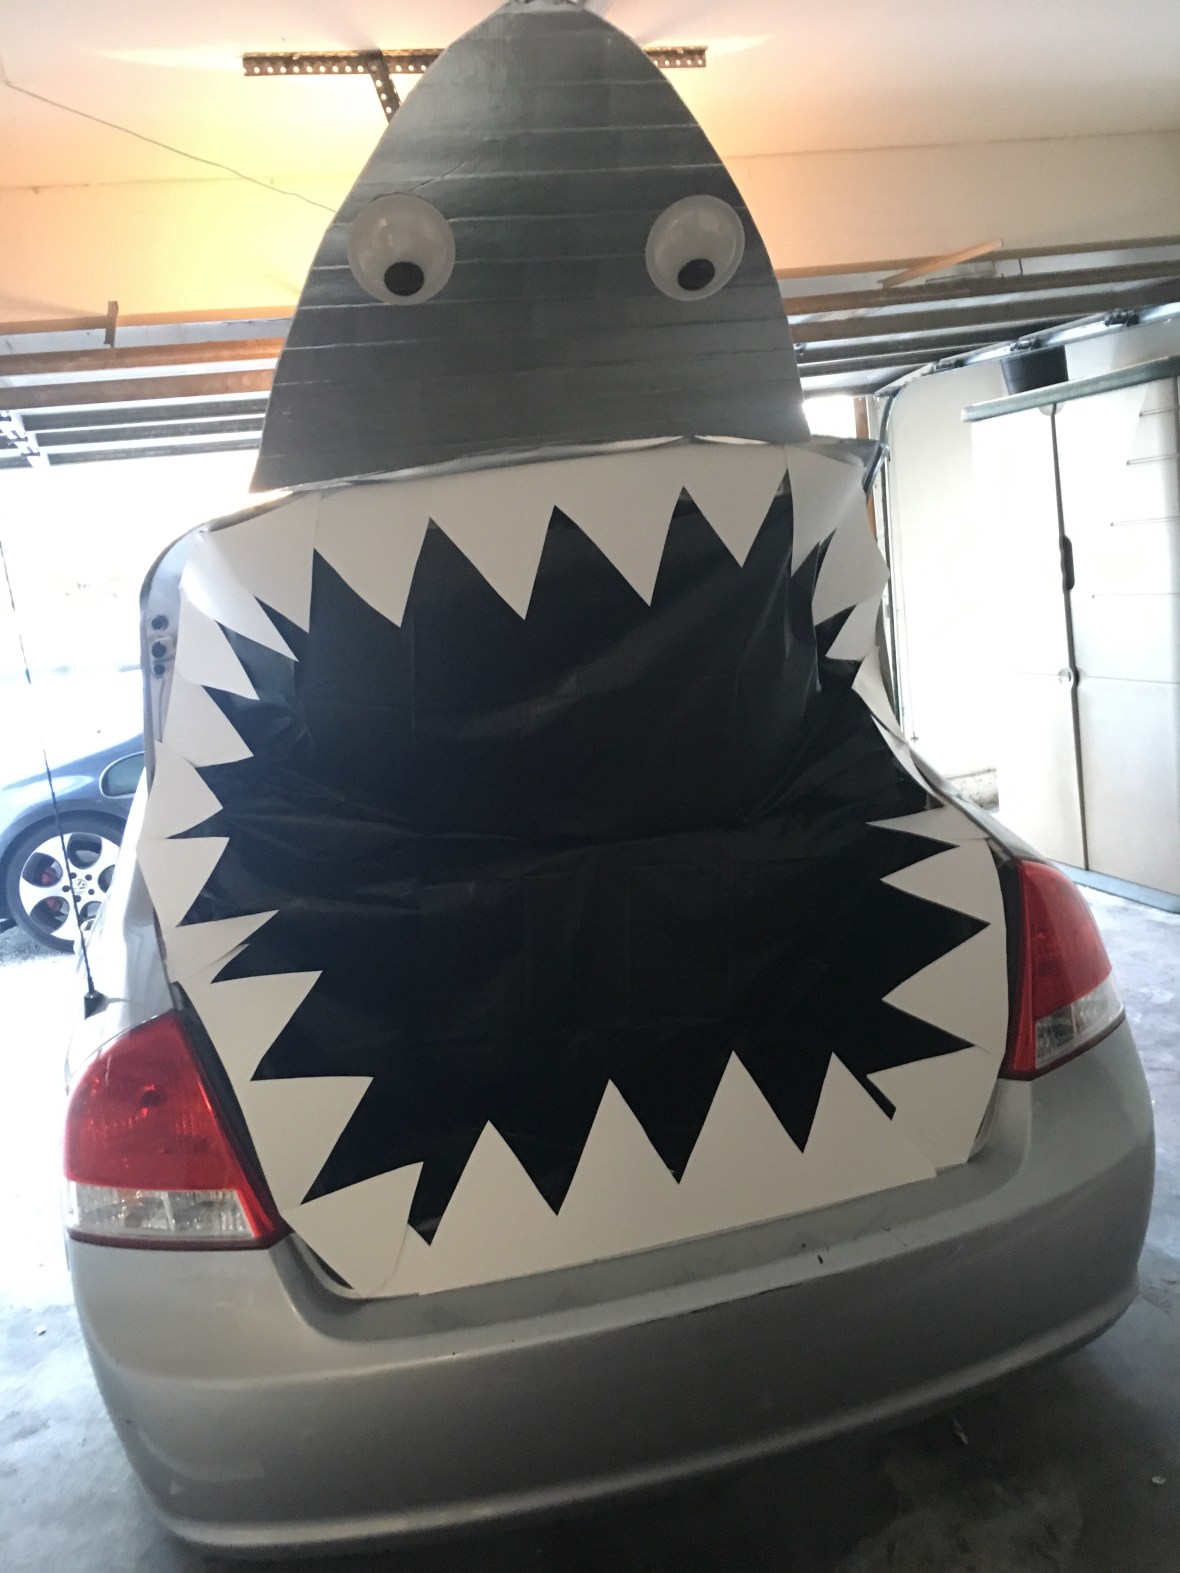
Since it was our first trunk or treat I wanted to do something fun and not too scary. Pinterest had some great ideas to help guide me in the direction I was going. My car is silver so I was thinking shark theme which morphed into a Finding Nemo Shark Jellyfish theme.
I sketched out my hopes and dreams. Lol 
In the beginning I thought id make a Shark with the ocean in its mouth but I didn’t see the logic. Eventually it clicked to make a game inside his mouth and ISpy came into mind. I’ve always wanted to find a reason to glue all those cheap (tiny choking hazard) toys from surprise eggs or quarter machines or favor bags. It’s genius!! We could just hang it on the kids room when we were done. Everyone wins!

This was made with two black foamboards (for sturdiness), hot glue gun, and black duck tape for the border. I even glue gunned the 2 boards together. It gets very heavy when all the items are attached.
I really didn’t know how to make this a game so they can win candy but my super smart husband suggested a Finding Nemo game. Perfect! I had a plush Nemo keychain with a small hook on it which I could pin him to the ispy board and change his location as the kids came around.
The sad part about this is… sniff sniff… IT MELTED!!!! Before the event even started. Setup was at 2pm and the event was 3-6pm. It was 90° and I was “lucky” enough to have been put directly in the sun. SUPER BUMMER! But live and learn. Don’t glue anything with wax (candles or crayons). Also the hot glue remelted and items started sliding down. Definitely a craft lesson for future projects.
Needless to say I ended up just putting Nemo on a box in the middle of the shark’s mouth and saying “Fish are friends not food!” in an Austrailian accent. Everyone loved it. Also, when the older kids tried to get the candy I would put the jellyfish tentacles on them.. ha! And a few little trick or treaters would get the privilege to pop some of the bubble wrap. Towards the end I let people hold the jellyfish and take pictures next to the shark. It’s pretty AND interactive!
Here’s my Shark/Jellyfish trunk or treat tutorial:
Shark Construction
Supplies:
- 3 posterboards
- 3 foamboards
- 2 metallic silver duck tape rolls
- clear packaging tape
- double stick foam tape
- 1 pair of extra large googly eyes
- red streamers
- black plastic table cover
- Start by taping the black table cloth inside trunk to hide the trunk parts.
- Definitely cut the shark teeth at home and then label the sections to make it easy for reconstruction at setup. I made 4 rows of 4-teeth strips on each poster board. I needed a top, bottom, right side (top, middle, bottom) and left side (top, middle, bottom). Attached to car with clear packaging tape.
- Red streamer paper (shark gums) need double sided foam tape to tape over teeth edge.

- Make sure to create the shark head and fins at home. Each piece is cut from a foamboard. Cover fins with silver duck tape (mirror image) for right and left side fins. Double stick tape eyes on the head.
 Duck tape shark head to trunk top at a slight angle so the kids see him looking down on them. Scary! Duck tape fins too.
 - A cheaper easier way to do this is to just spray paint with silver paint on the head and fina. I just happen to have the duck tape on hand.


Treasure Chest Construction
- 2 empty diaper boxes
- 1 roll of 2″ drafting tape
- Black duck tape
- Black glass rocks (dollar tree)
- Black foamboard
- Shiny gold paper
- 1 can of gold or brass spray paint
- Black & brown acrylic paint
- Large rocks optional (dollar tree)
- Blue tissue paper optional
- I’m all about upcycle! Now’s the chance to repurpose those diaper boxes. Tape the first diaper box closed. Tape good so it’s sturdy. I taped inside and outside. Cut a line on 3 sides of the diaper box so it opens like a chest. The second diaper box is used to cut the round top to the first box. This part was tricky and takes some alignment, lots of trimming and tape!
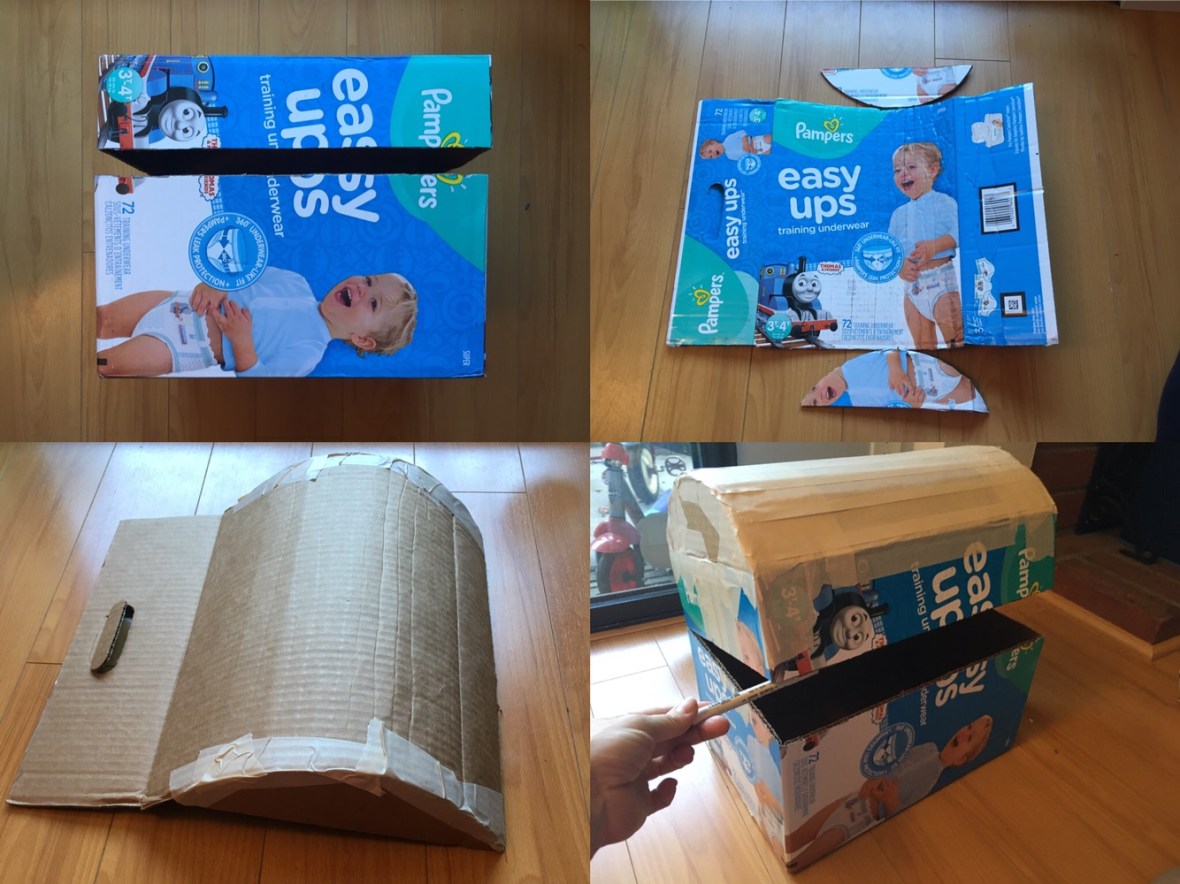
- Next I taped the entire chest with drafting tape to minimize the busy blue sides so I’d use less spray paint. I made sure to go the direction wood on a chest goes: horizontal.
- Painted a few coats of gold spray paint.
- When it was dry, I lined the edges with black duck; half on the front side folded over to the back or the next side.
- Then I painted dark brown and brown accents to mimic rotted wood panels.
- Hot glue gunned the black glass rocks to the duck taped edges.
- Finally I cut out a fake lock from black foamboard. Cut a key hole on the bottom piece and taped gold magical paper behind it. Painted the sides of the lock foamboard with black paint.
- The top of the chest is heavy so without candy in it it will fall backwards. I put large black rocks inside and garnished with ocean blue tissue paper. Candy to be placed on top of course.


Ocean Wave
- Light blue plastic table cloth
- Medium blue plastic table cloth
- 2 bags of blue glass rocks
- Lay medium blue plastic close to under the trunk on the ground
- Light blue plastic gets crinkled up and placed on the outer edge of the first one.
- Sprinkle rocks all over plastic (the forecast said breezy so I figured these would be weights). Some kids actually preferred the rocks over the candy!
- Place trunk in the middle of the wave
Jellyfish Umbrella Costume
This was a recontruction of last year’s light up jellyfish costume. Check out the tutorial here.
Since the umbrella was thrown away last year I went to Daiso Japan $1.50 store and bought the most see through umbrella I could find and spotted a blue/pink polka dot one. It actually didn’t look too bad as is and not lit up. So many compliments! 🙌

And this year I wore my double brushed poly rainbow cake leggings I made. Peg legs pattern (with the magical contour waistband update 🙌) from Patterns For Pirates along with that delicious fabric from Pink Zeppelin fabrics. Seriously it’s all you need really. Everyone just loves the bright colors.
Couple things I would point out about this Trunk or Treat experience:
- Don’t procrastinate (that’s a given)
- Try to do as much crafting and planning as you can at home
- Check the weather to plan for extreme conditions; heat, rain and wind.
- Don’t forget sunscreen! Thankfully my umbrella provided some shade.
- Wear comfortable shoes (definitely not flip flops) OR bring a portable seat. Four hours of standing is brutal! I couldn’t sit or leave my car because I was part of the trunk theme. I felt compelled to stay in character. Lol
- Duck tape is safe to use on your car’s paint job. Probably for the short amount of time it’s used.
- If your kids are going to the Trunk or Treat, make sure you have a willing family member to man your car while you enjoy the party for a few minutes or an hour. Take cute pics with them.

- Remember to take lots of pictures of your masterpiece. All that work and it gets distroyed before you know it.

This was a wonderful experience hands down. I think next year if we decide to participate we will either reuse this idea (yes, I save everything) or we’ll do a different theme super low key. Because at the end of the day it really only matters to the kids (and some parents) how much candy they scored!
Have any of you done a trunk or treat? I’d love to hear how you survived!
Thank you for stopping by ❤️Mel

OMGoodness!!! You guys are so adorable!! What a wonderful craft!
LikeLike
How did you attach the two fins to the car? I love the idea!!!
LikeLiked by 1 person
I used silver duct tape! 🙌 … just made sure to take it off right away and clean the car exterior.
LikeLike