Hello my Blippi fans! Halloween is right around the corner and many of our littles are dying to be Blippi for Halloween? 🧡💙 “Haaaaalloween! Haaaaalloween! I just love Halloween! HALLOWEEN!” … yeah we always have that video on repeat! Lol 😊 
Something I’ve noticed this week is that due to the ever increasing popularity of Blippi, his hats and accessories are becoming out of stock online as we approach Halloween. This post will guide you step by step to make your very own Blippi hat as well as tips to a no-sew solution. 👍
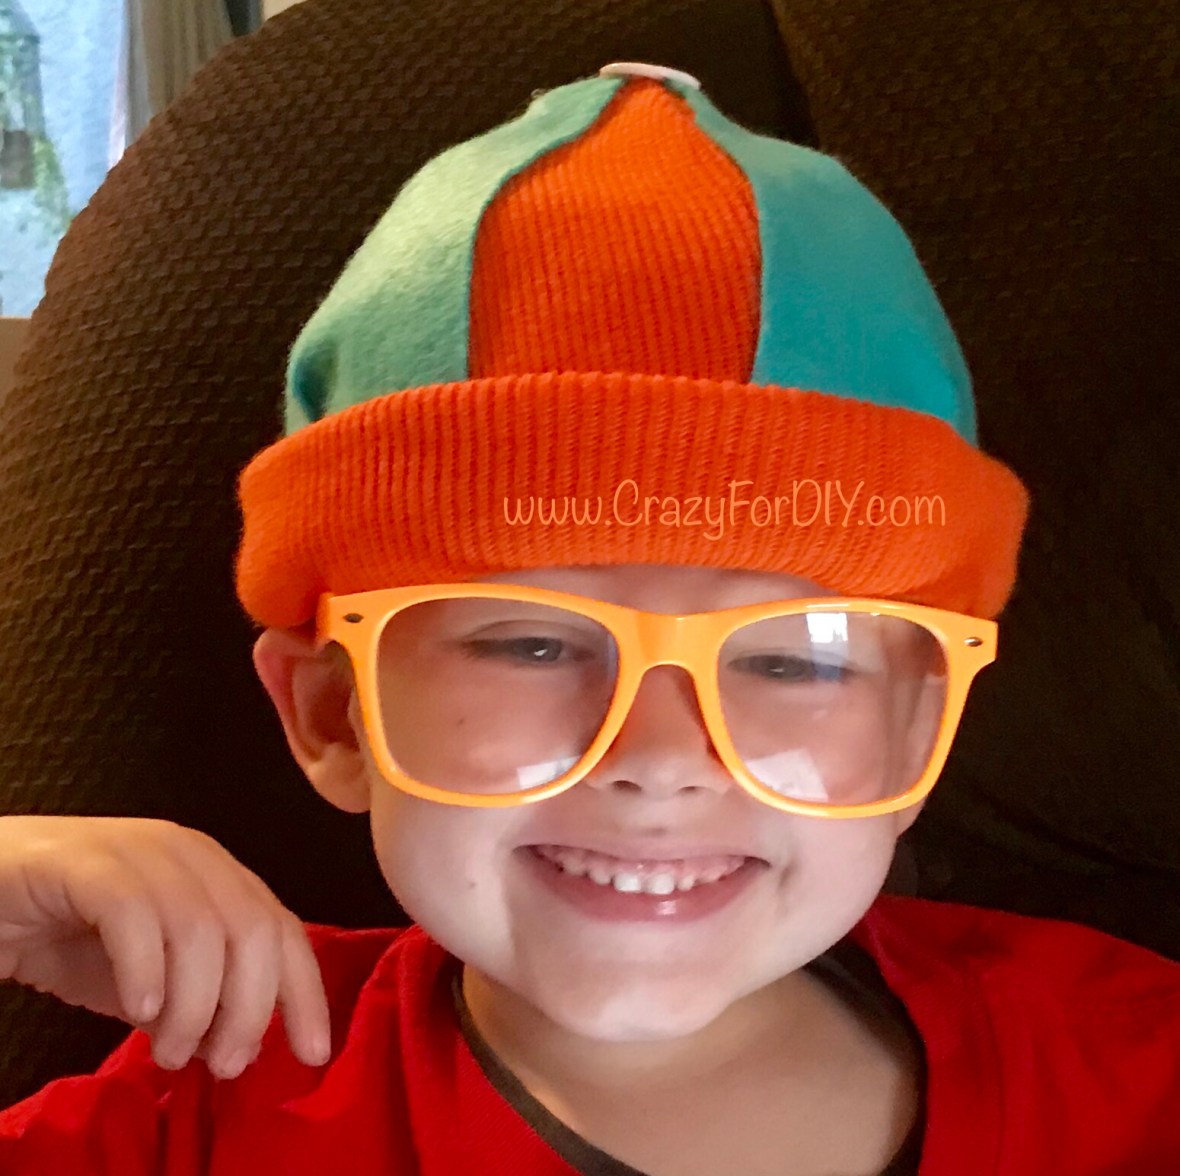
What makes a Blippi costume look complete?

- Blue and orange beret hat
- Orange glasses
- Orange bow-tie & suspenders
- Blue shirt
- Light grey jeans
- Blue and orange shoes
My original tutorial will help you make a toddler or small child size Blippi felt beret hat which is fitting for up to about a 19.5” head measurement
 If you are making this for a child (about 4 years old and up) with a head size larger than 19.5” I recommend using the adult size version of this free (for personal use) beret pattern/tutorial from Lil Blue Boo. This pattern calls for stretch fabric on the band but you could use the non-stretch felt band as a casing for an 1/4” elastic band. Here’s a side by side view of child vs adult hats from this pattern:

My 5yo measures about a 20.5” head circumference. For the band, I added 1 more inch lengthwise to the pattern giving it an extra 2” (22” total length).

Also, since I’m using felt, the beret ended up being too stiff and looking a bit long on the sides compared to Blippi’s hat. Yikes! 🤦🏻♀️ 
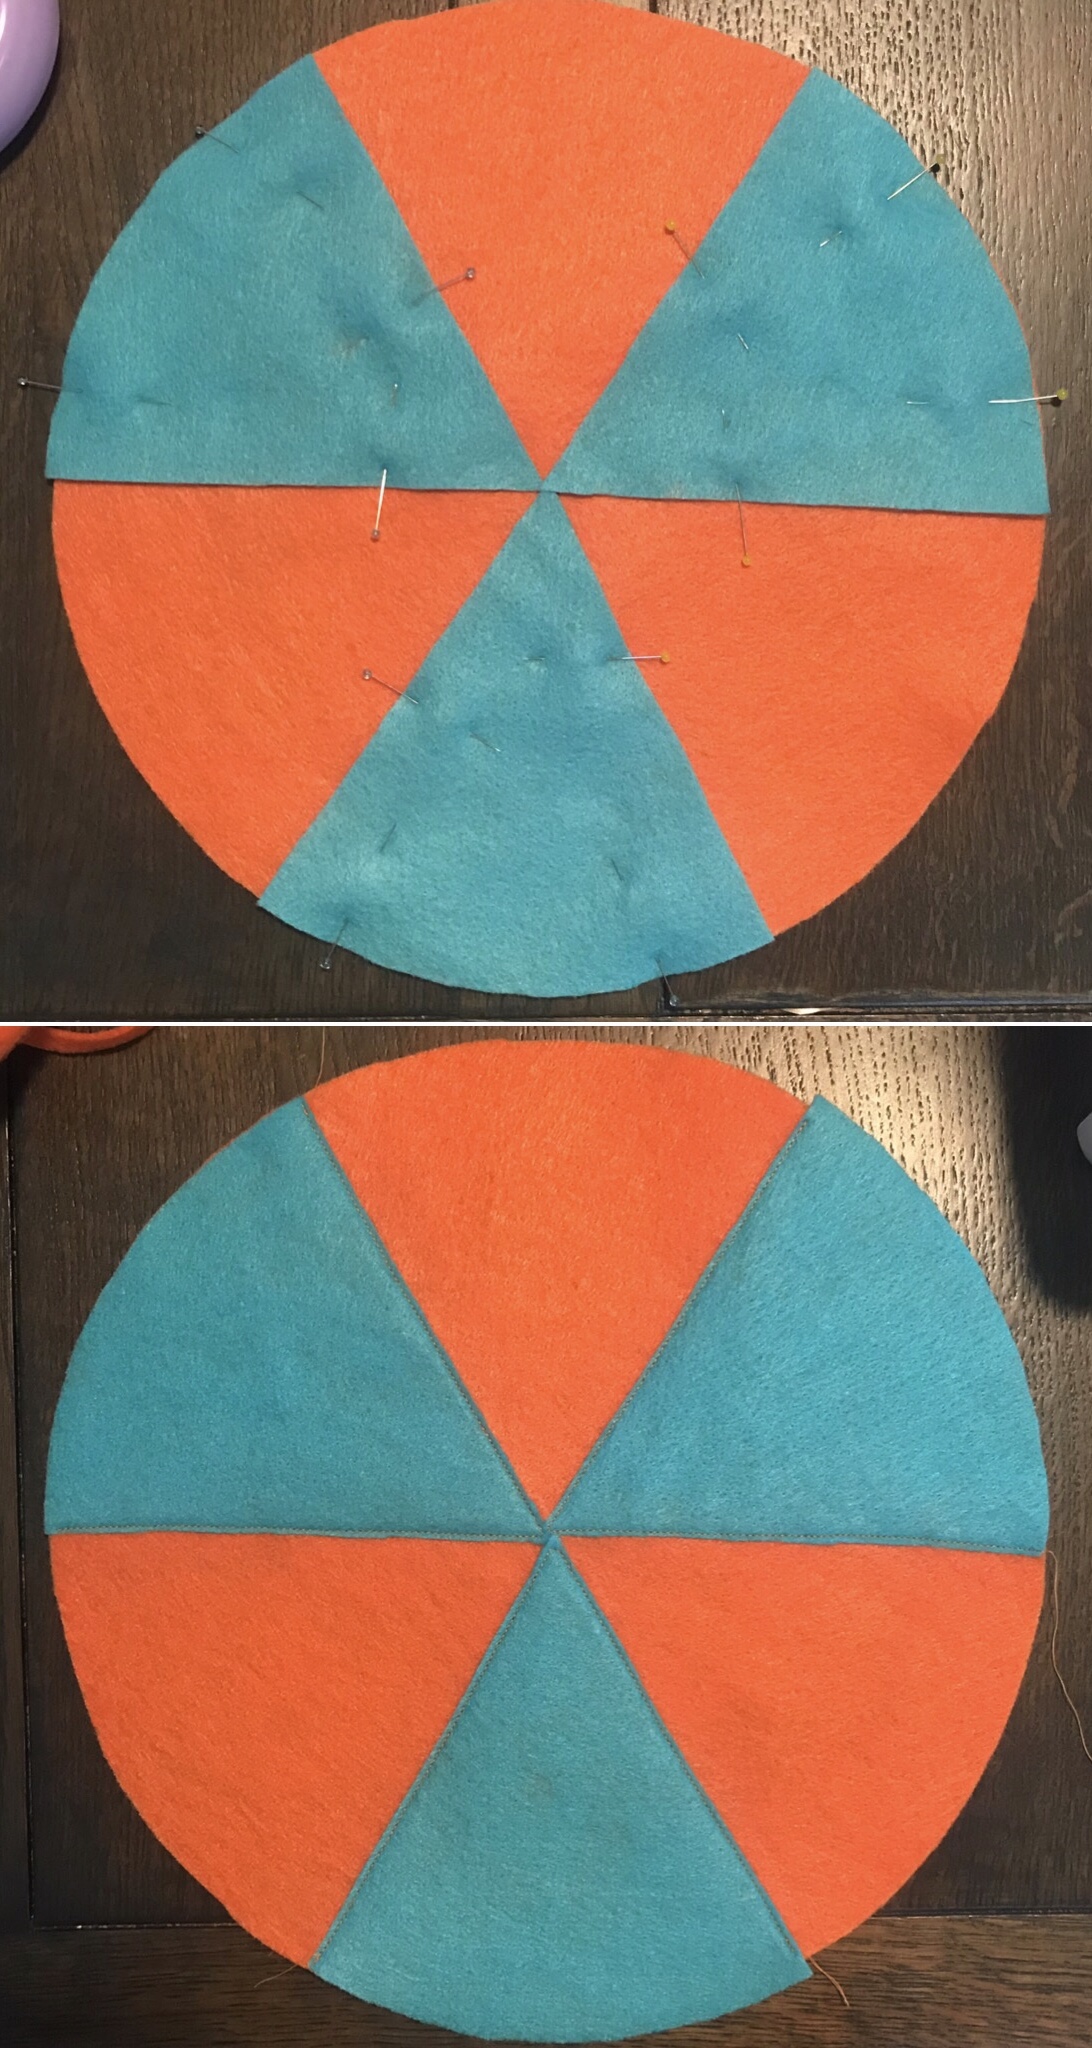
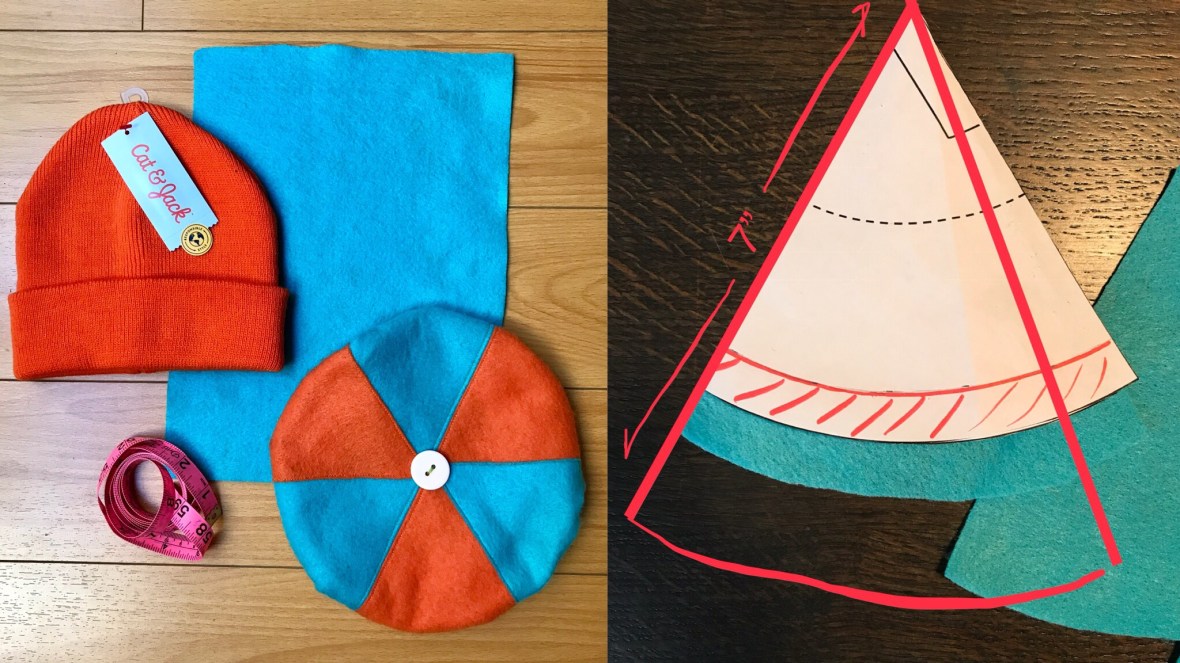
To fix that, I trimmed 5/8” off the outer edge as well as 1/2” off the bottom piece inner circle. I took a picture of the modification I made while sewing as accurate as I could. Red sections are what I cut out.

If you find that the 22” band is not long enough to pin exactly to the bottom inner circle than you can do a gentle tug to stretch out the felt a little. The nice thing about felt is it can be stretched out but the sometimes not so nice thing is it doesn’t stretch back into original size. So be careful not to stretch too much. 😵 If you need even more band length and added say 2 more inches lengthwise to the band pattern piece (making it 24” long) then you’ll need to trim off more bottom piece inner circle until it measures the same length in its circumference. I just trim about 1/4” at a time until it’s close enough. Then stretch.
Also, for this large sized hat project, I purchased craft solid gold felt 72” by the yard at $5/yd at Joann’s.

I only used a 16×25” section of the gold felt. You could easily make 3 adult hats out of 1/2 a yard of this gold felt. In the child size pattern tutorial I had to use sections of the gold felt I had lying around to make the big circle pieces so being able to cut the whole pieces out that I needed saved a lot of time. 👍
I still had the same light teal felt from before and I was able to cut the 3 teal pie pieces from a 9×12” felt sheet. If you fold the large top pattern piece in thirds (instead of measure and cut the pie pieces out) then you can avoid having to print and cut another whole pattern piece.

Pin teal pie-shaped pieces to orange top circle piece and top stitch on the blue pieces. I used orange thread to contrast with the teal.
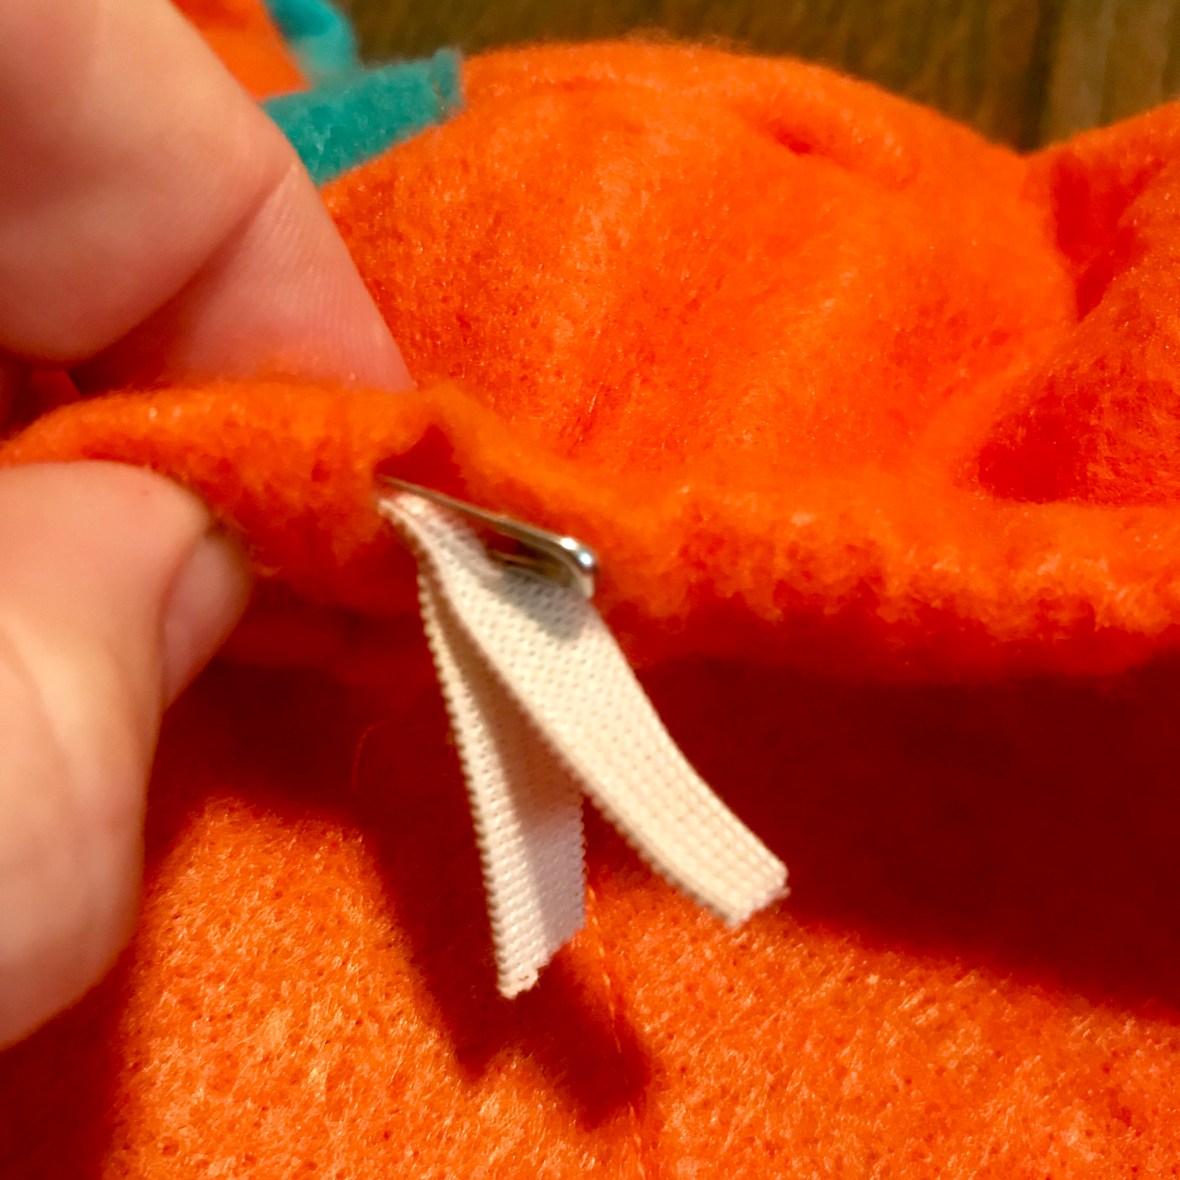
You can cut a hole in the inside of the casing and add the 1/4” elastic band. Attach each end of the elastic with a safety pin and leave the hole open. I do this in case I need to adjust for another size head.
Don’t forget the button! Sew a white 1″ button on the top. Done.
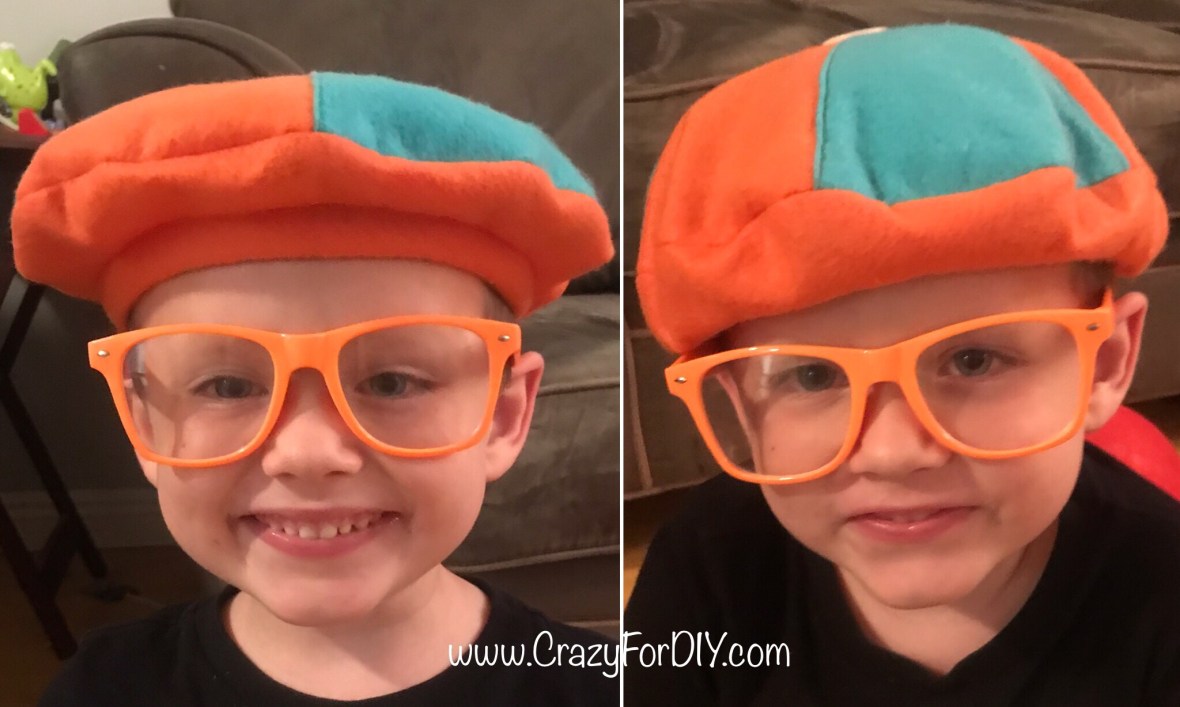
Another tip is this hat looks better if you flip the band inside so you don’t see it from the outside. Like this 👇 Same exact hat, 2 different looks.
NOT CRAFTY? No problem!
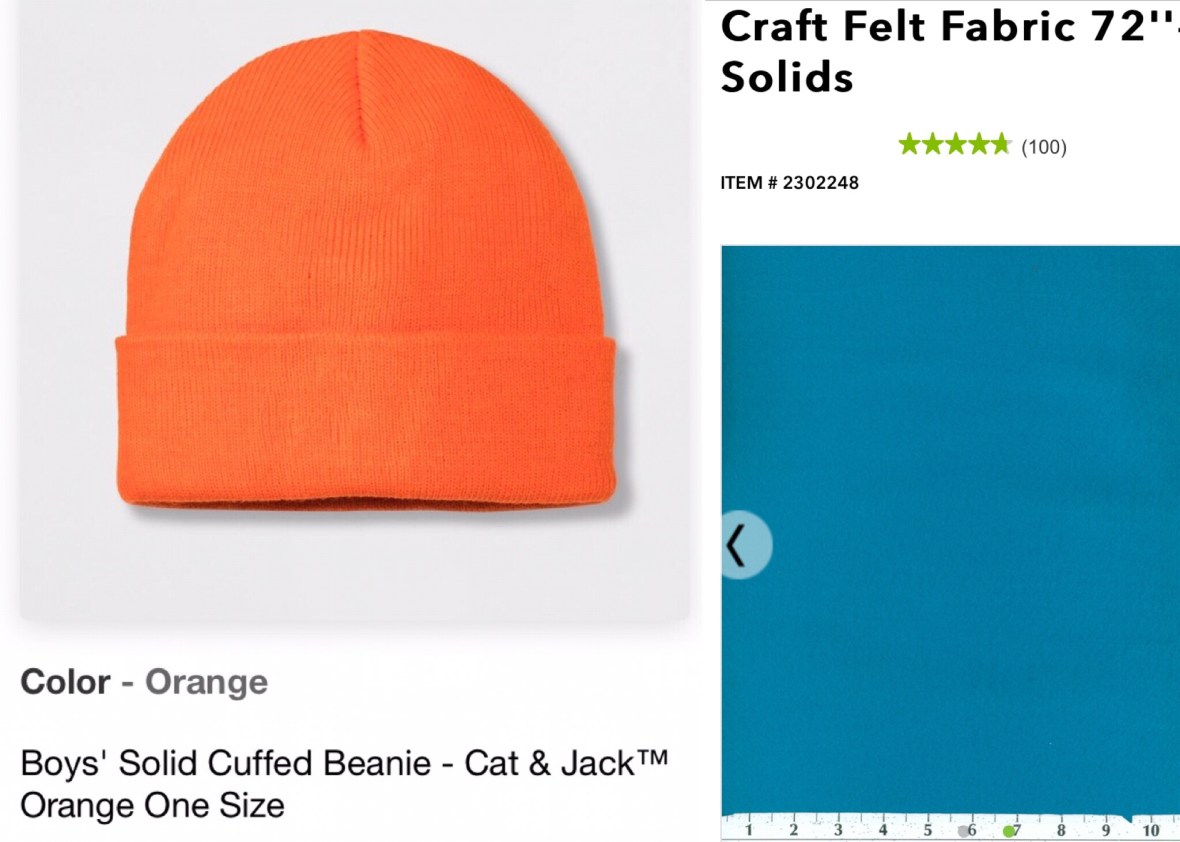
Another suggestion I would have for non-crafty or busy parents in a very tight bind for a Halloween Blippi hat is to buy an orange beanie like this Cat & Jack(TM) beanie at Target and hot glue gun 3 peacock felt pie-shaped cut outs on top. Good enough for one night and some quick pictures!
It will look more like the beanie that comes with the Blippi pajama set at Target:

********
update 10/18/18:
I’ve had a request to show how I did the no-sew beanie hack. It’s not ideal. It’s very wonky but in a bind it’s something 🤷🏻♀️
I recommend constructing this hack on a ball or balloon the same size as your child’s head, because it’s a beanie and it expands when your child puts it on. The shape of the beanie is waaay different then the beret which I found out after I had already started gluing.
I cut the felt pie pieces the same as the adult pattern but noticed they were too wide for this beanie and too short. Even what I cut out the pieces (thinking I gave it enough length) was still too short. Here’s what I recommend for cutting the pieces:
Before I started gluing the pieces I noticed, as with most beanie hats, there’s an excess of hat on top so I folded it over and hot glued it down.
Then placed the blue felt pieces on top and pinned.
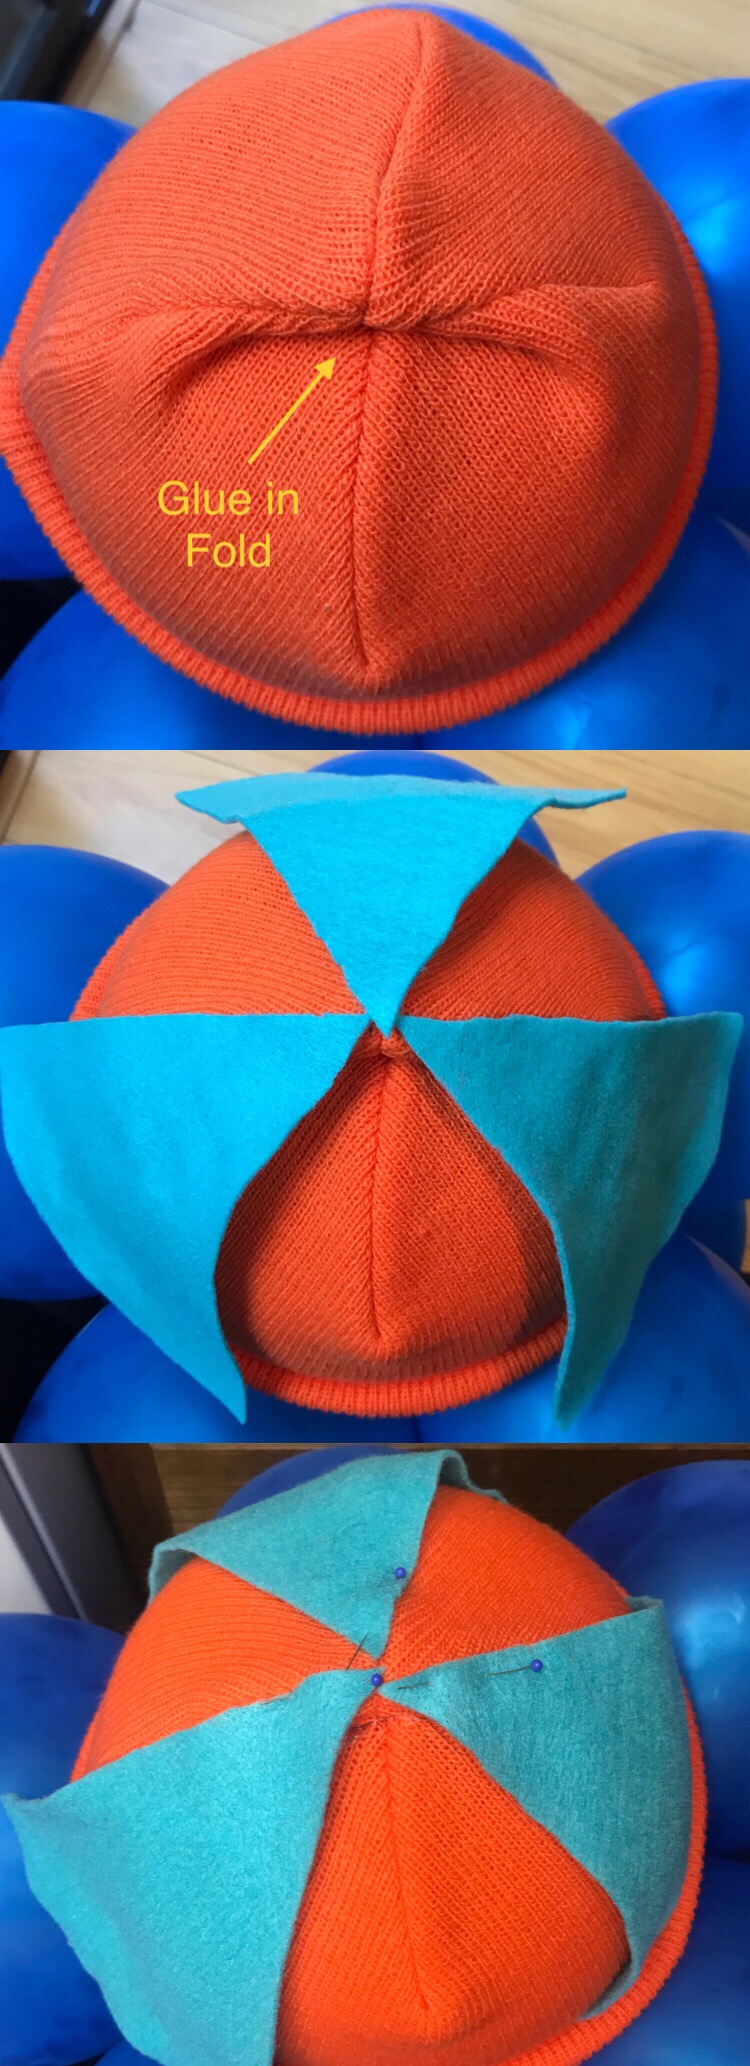
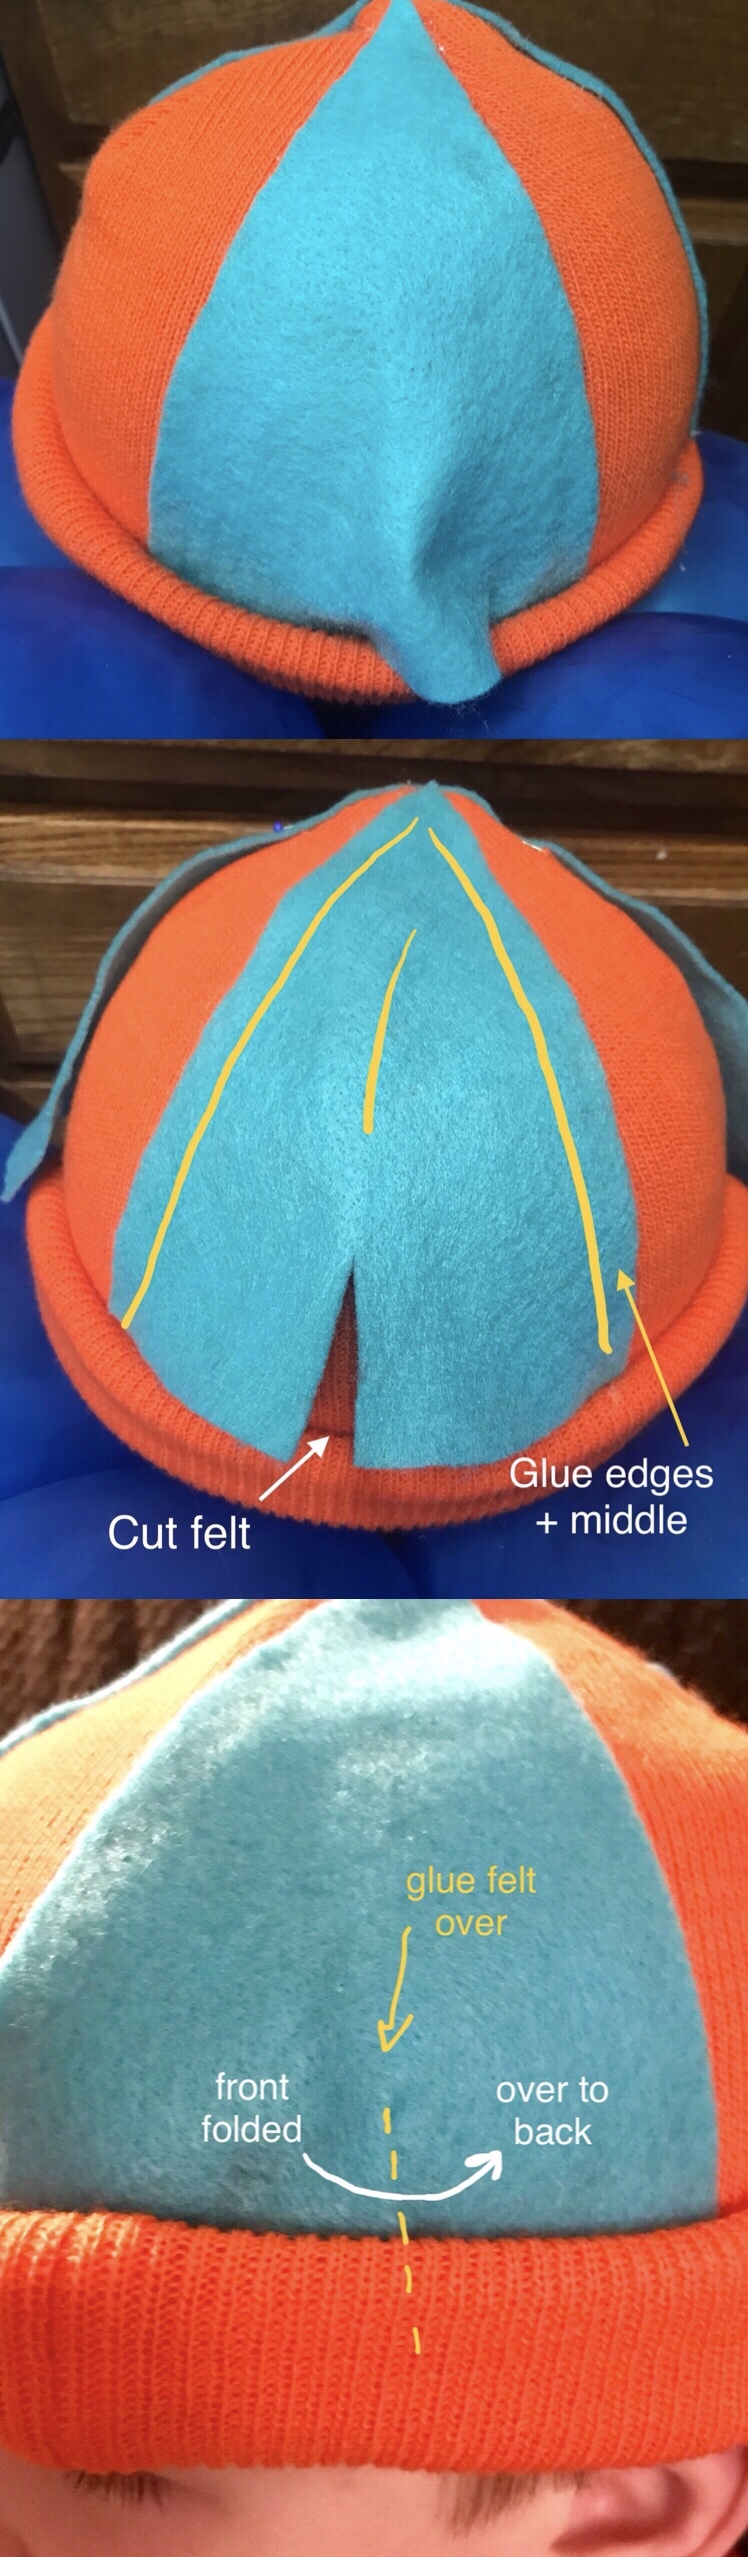
Then I glued the sides of the pieces and some in the middle down to the beanie, trying to keep the blue pieces straight almost following the grain of the knitting. When you do this it leaves a significant gathering in the middle bottom of the pieces.
I cut a slit in the middle and folded over the side closest to the front over to the pieces closest to the back. That way when you take pictures you don’t see the fold. I did that and it’s a thumbs down 👎
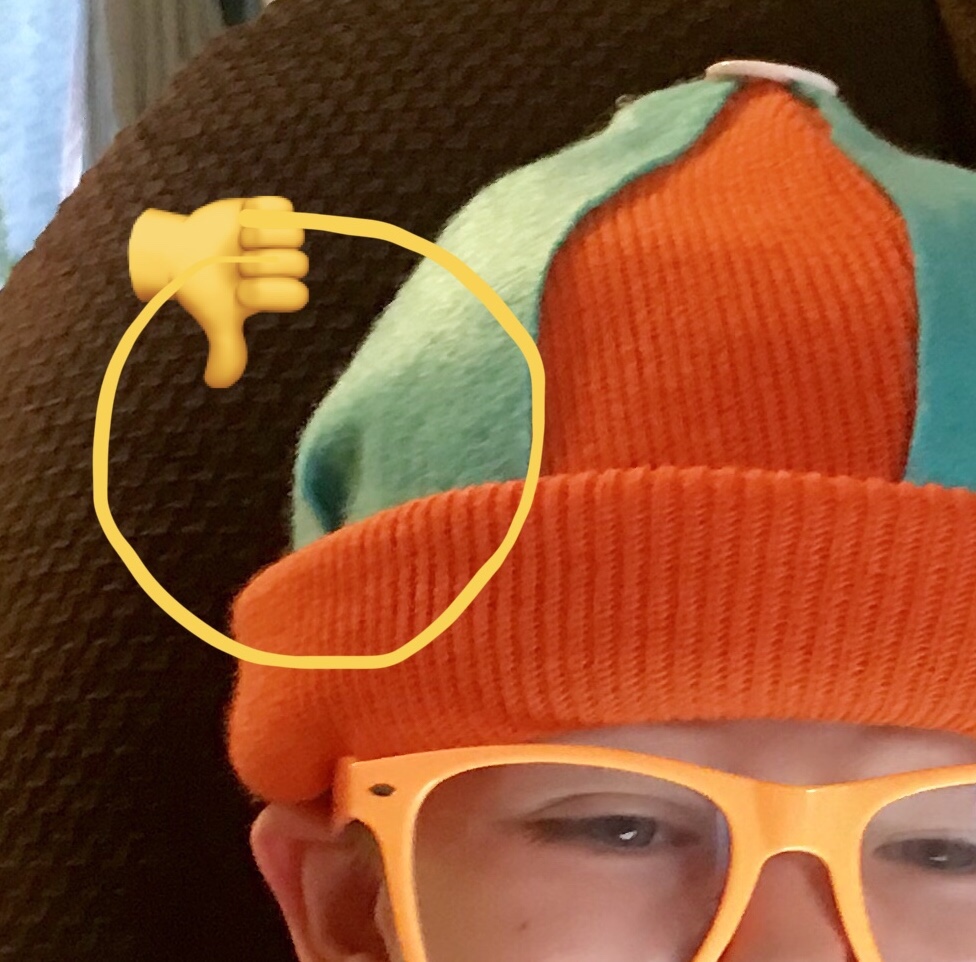
Here are the glued pieces and the button on top glued. It’s messy and painful (I ALWAYS get burned with my glue gun 😩) but I hope these pictures help so you don’t have to make the same mistakes I did.

Finished beanie Blippi hat:
*********
I truly hope this post helps parents out there who are super lost and frustrated about completing their kids Blippi costume with this hard-to-buy hat.
If this was helpful, please “like” my post. 👍
Let me know if the comments if you’ve tried this. Tips and tricks to add are always welcome! 😍
Thanks for reading!
-Mel
I love to post DIY updates in the making ❤️ … because every day has it’s crafty moments! IG & FB @CrazyForDIYMel
* This content uses referral links. Read my disclosure policy for more info.

Cutest beret ever! You did a wonderful job!
LikeLiked by 1 person
Thank you!!! ❤️😍🤗
LikeLike
How creative…Great job! Thank you for sharing the “How to”.
LikeLiked by 1 person
Thank you! Happy to share 🤗
LikeLike
Very cute hat. I am making one for my grandson using the child size pattern.
Should I trim the additional 5/8″ off the outer edge &inner circle of the bottom piece?
Thanks!
LikeLiked by 1 person
Hi Judith! It’s been so long since I’ve seen this hat. I’d say “yes” if it’s just extra fabric after sewing the seam. I hope that helps.
LikeLike
Thanks, I was More wondering about the trimming you did on the large size hat pattern before sewing, in order to make the shape better (?)
LikeLike
Oh! Yes, now I remember. I originally sewed it with the 1/4” seam and it was too big . I turned the hat inside out again and made another seam from the edge at 5/8” so that affected the top circle piece and the inner circle piece. So instead of the original 1/4” seam allowance I made it 5/8” when sewing those pieces together.
LikeLike
I just made your Blippi hat for my adult son’s costume to match his son’s costume. I used an orange sweatshirt to cut the circles, then stitched the blue triangles on the same way you did. However, for the hat band, I cut the stretch band from the bottom of the sweatshirt, above the stitching. Then I measured the length, cut it, stitched the ends together and sewed it on to the hat. It worked perfectly!
LikeLike
I’m a beginner sewer and have sewn the first two pieces together…how do you sew the third piece (the band) to it? I read the directions on the website with the original pattern but still don’t understand!
LikeLike
I am confused with attaching the smaller circle of fabric and the hat band. Could you elaborate
LikeLike
I have a really good picture explaining this process in my first Blippi hat post
LikeLike
How much elastic did you use?
LikeLike
I believe it was the length around my son’s head. You’re going to want the elastic to be snug but not too tight around the head. If you use a safety pin to pin the elastic ends together than they can be adjusted as needed. I hope that makes sense.
LikeLike
That really helps me. Thank you.
LikeLike